Are you looking to make trick-or-treating extra special this year? With these DIY Halloween Treat Boxes, now you can!
The best part is that they are so easy to assemble that your kids can make them, too. Who doesn’t like a craft, decoration, and gift- all in one?
With the help of our free printable Haunted House treat box template, you’ll be able to make as many little treat boxes as you want.
Use them to hold Halloween treats and give them to your special trick-or-treaters. Or, use them to carry your Halloween party favors. They will look spooky-cute as decorations for your party as well.
Ready to discover how to make these haunted house boxes?
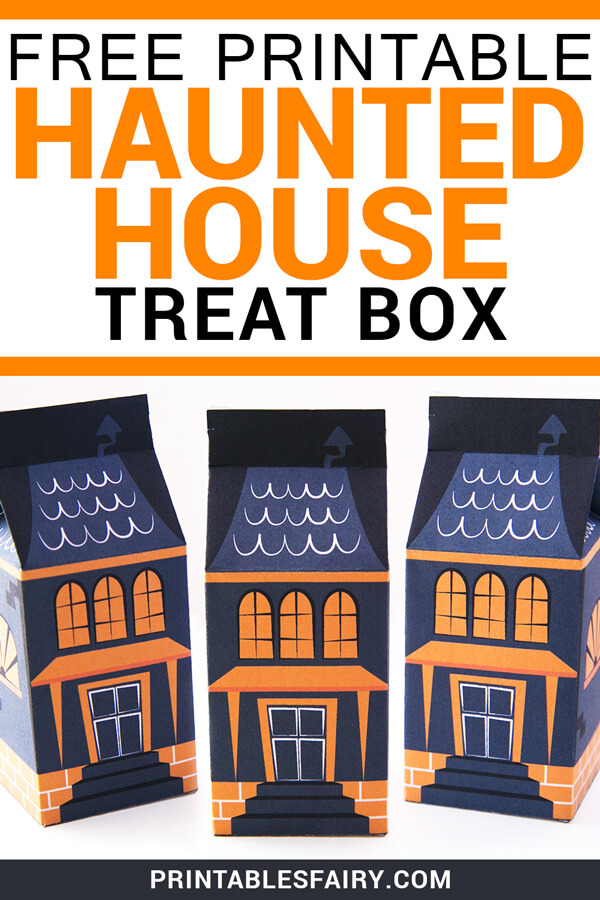
DIY Halloween Treat Box
You can easily make these Halloween treat bags using our printable template. Just print, glue, and fold to make your spooky houses in minutes!
Each box is around 13 cm tall x 5.5 cm wide x 5.5 cm deep and can fit a 9-10 cm tall object.
You can print the template on A4-sized cardstock. Or, select “Fit page” on your printer settings if printing on another paper size. Just remember that if you choose the second option, the size of the box may change slightly.
Once you have your template and all the materials mentioned below, you can follow the instructions to put up your box.
There is also a video tutorial right after, in case you prefer to watch me assemble a box.
Materials
To make these easy Halloween treat boxes, you will need scissors, glue, white cardstock, a printer, and the Haunted House Treat Box Template.
You can download this free printable template by clicking on the red link at the end of this post.
Or, you can get this Halloween box template in my shop here (A black and white version is included with your purchase).
How To Make a Haunted House Treat Box
- Print the treat box template on white cardstock and cut it out.
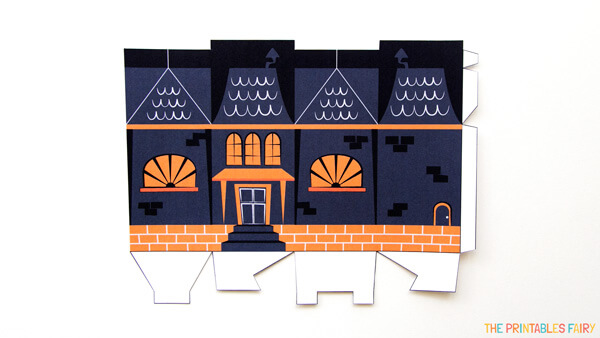
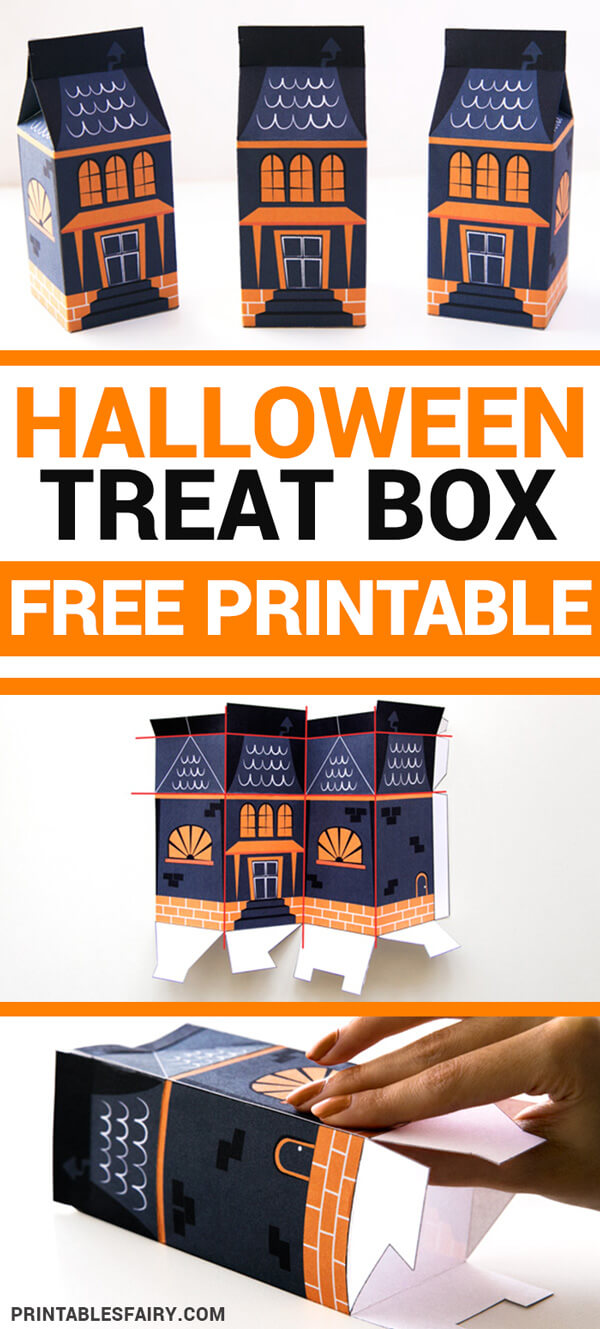
- Fold the box along the 2 horizontal and 3 vertical lines shown in the picture below. Also, fold the white flaps.
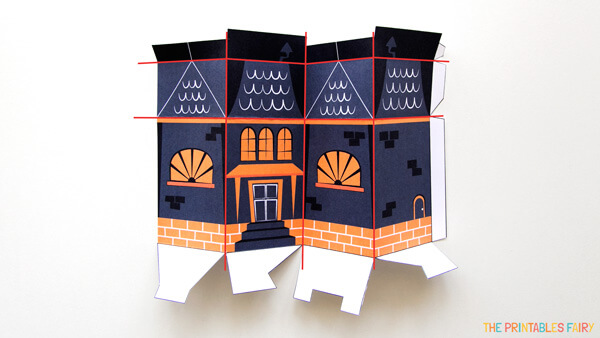
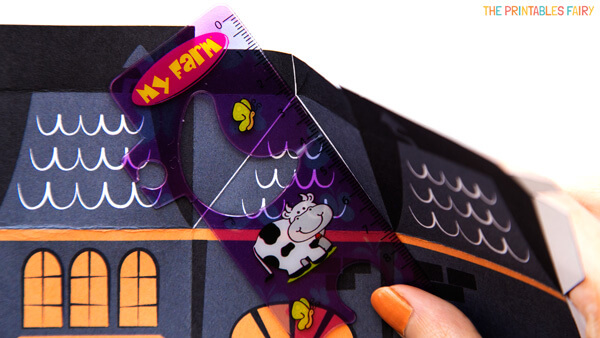
- Fold along the lines on the roof. You can use a ruler to keep your lines straight.
- Apply glue to the white tabs on the right.
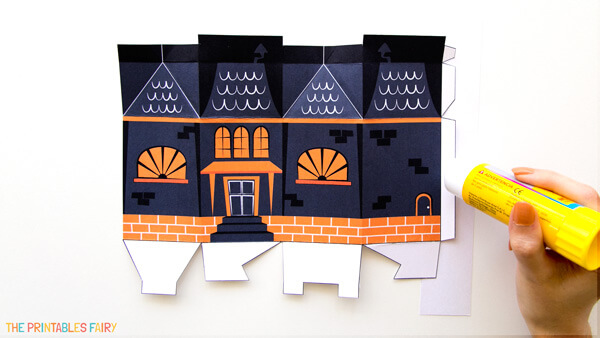
- Fold your cardstock and glue the side tab to make a box. Alternatively, you could use double-sided tape to stick the box together.
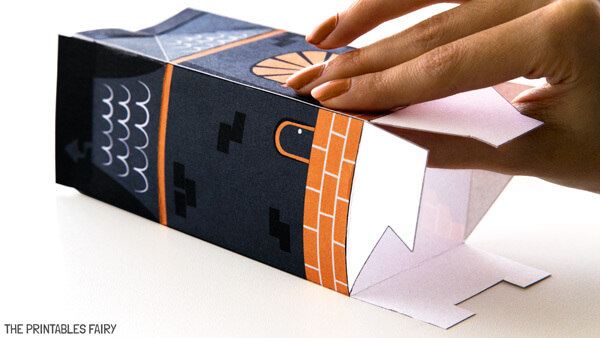
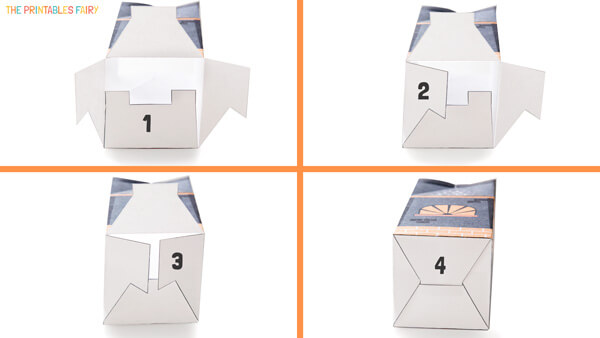
- It’s time to fold the bottom of your box. And guess what? You won’t need any glue to keep it together!
Start by folding in flap 1. Then, fold flaps 2 and 3 to the middle. Finally, fold flap 4 and insert them inside flap 1.
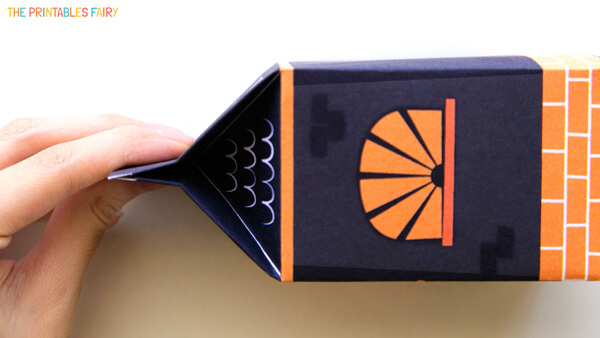
- To close the top of your box, push the sides of the roof (folded on step 3) until the two flaps with the chimney touch.
- To finish, fill your box with treats and close it using tape. You can also make a hole in the flaps and tie some ribbon through, or use mini pegs.
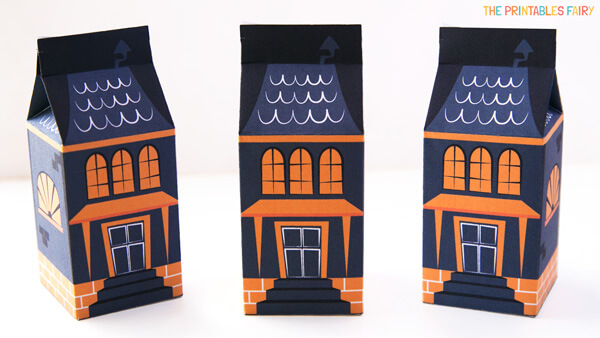
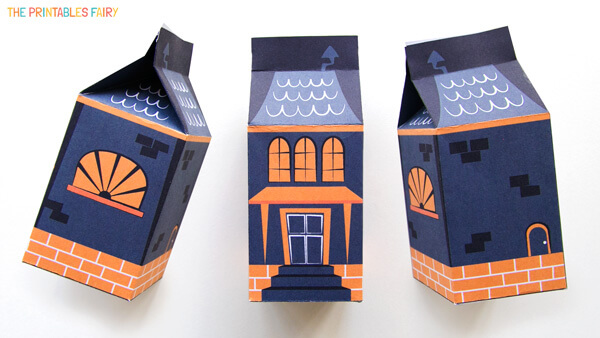
Your Haunted House Treat Boxes are ready!
It doesn’t require too much dead-dication to end up with these fang-tastic Halloween Treat Bags.
Haunted House Treat Box Video Tutorial
As you can tell, making this Haunted House Treat Box is very simple!
But, if the written instructions were not enough, take a look at this video tutorial, where I show you the step-by-step process I followed to assemble this spooky box.
Free Printable Halloween Treat Box
To download this spooky-cute Halloween treat box, simply click the link below and follow the tutorial to assemble it.
DOWNLOAD THE FREE HALLOWEEN TREAT BOX
*Please remember that these printables are for personal use only. You may not sell or distribute the files. If you want to share them, please link to this post and not directly to the PDF files.
As I told you earlier, you can also get this treat box template right here.
There is a black and white version also included, in case you prefer to let your kids decorate their haunted houses (and to save some ink 😉).
I’d love to see what your Halloween Treat Boxes end up looking like! If you’d like to show it off, share a photo on Instagram and tag @theprintablesfairy.
More Halloween Crafts and Activities
- DIY Halloween Bookmarks
- DIY Halloween Masks
- Free Printable Halloween Word Search
- Free Printable Halloween I Spy
need these! 🙂
bertharss321@gmail.com
I cant wait to use these treat boxes for my class they are adorable. thank you
So cute!
Went searching for help on how to assemble some I had received and came acrossyourwebsite. Would have loved to watch the video but your step by step guide was helpful. Thank you so much.
I’m glad you found these step-by-step instructions helpful, Julie. There is also a video tutorial right under them in case you still need it.
These are sooooo cute!!!!
Hope you have fun making them!